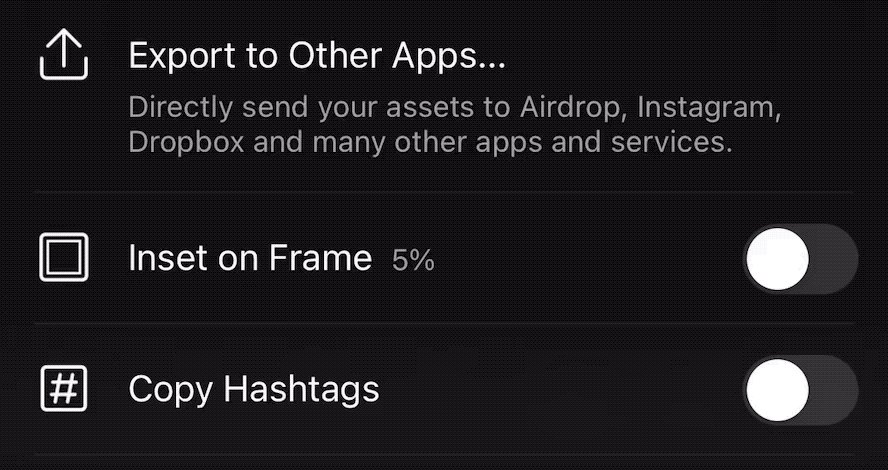
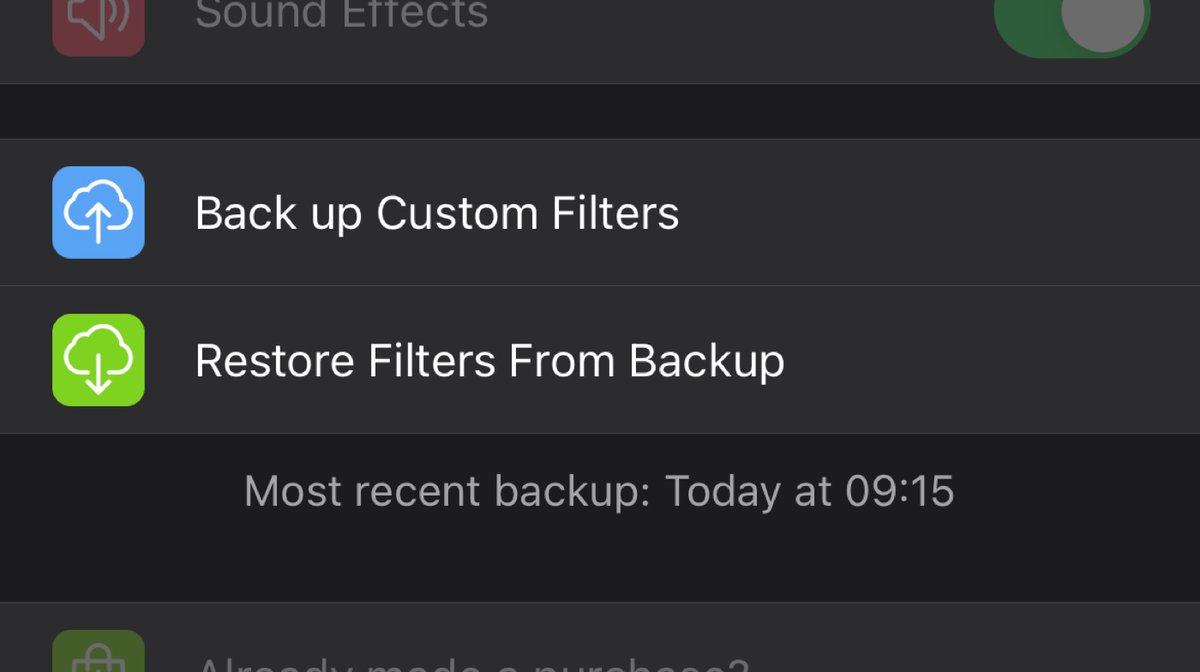
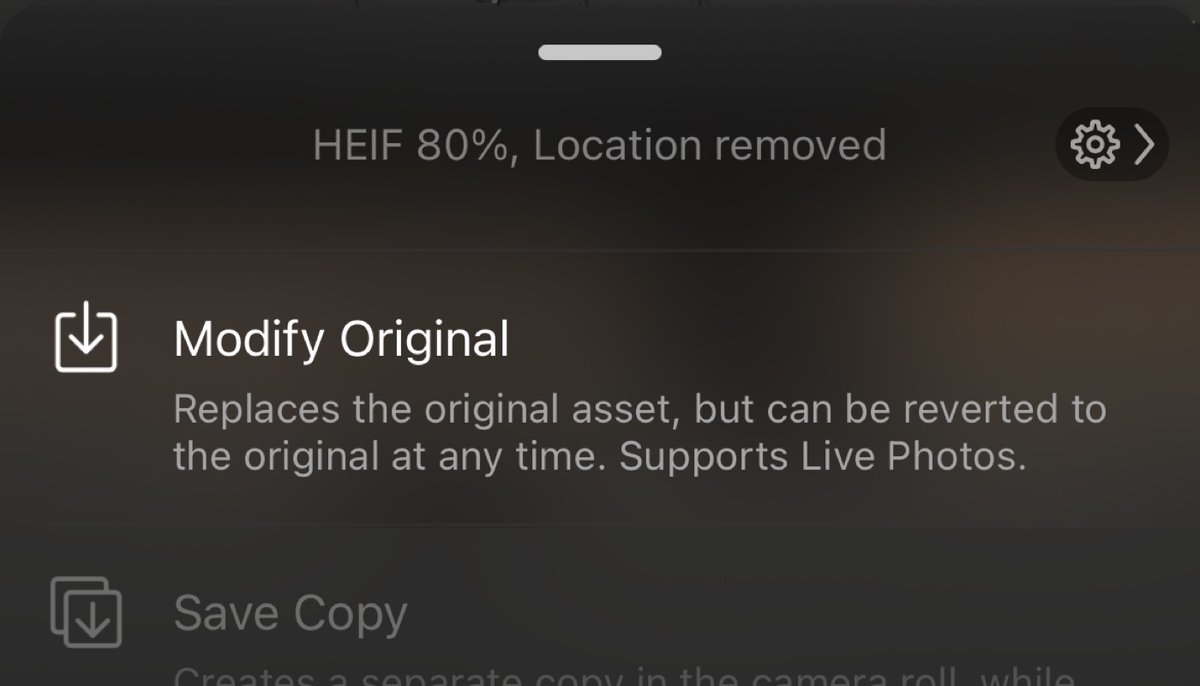
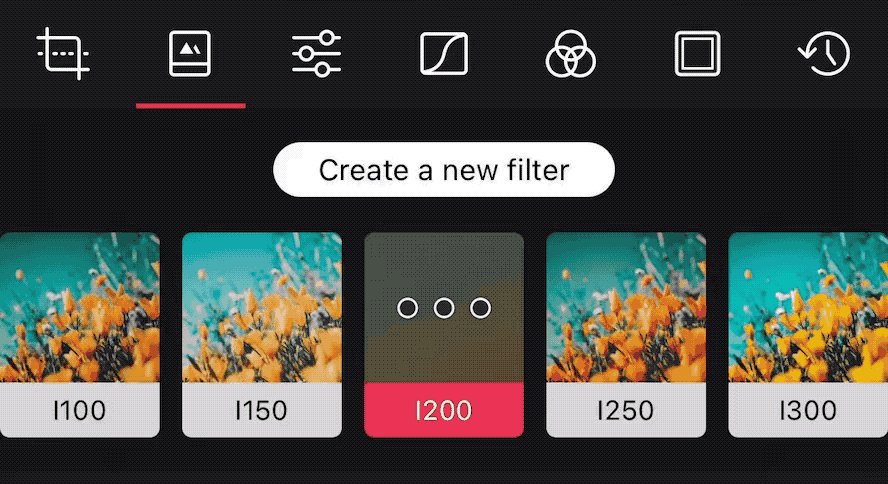
Following up last year’s surprisingly popular "10 things you likely didn’t know about Darkroom" and your many requests for more tips, we put together a second edition that focuses on workflows in Darkroom. Click through to read it all right here in this thread.


More from Tech

1/ 👋 Excited to share what we’ve been building at https://t.co/GOQJ7LjQ2t + we are going to tweetstorm our progress every week!
Week 1 highlights: getting shortlisted for YC W2019🤞, acquiring a premium domain💰, meeting Substack's @hamishmckenzie and Stripe CEO @patrickc 🤩
2/ So what is Brew?
brew / bru : / to make (beer, coffee etc.) / verb: begin to develop 🌱
A place for you to enjoy premium content while supporting your favorite creators. Sort of like a ‘Consumer-facing Patreon’ cc @jackconte
(we’re still working on the pitch)
3/ So, why be so transparent? Two words: launch strategy.
jk 😅 a) I loooove doing something consistently for a long period of time b) limited downside and infinite upside (feedback, accountability, reach).
cc @altimor, @pmarca
4/ https://t.co/GOQJ7LjQ2t domain 🍻
It started with a cold email. Guess what? He was using BuyMeACoffee on his blog, and was excited to hear about what we're building next. Within 2w, we signed the deal at @Escrowcom's SF office. You’re a pleasure to work with @MichaelCyger!
5/ @ycombinator's invite for the in-person interview arrived that evening. Quite a day!
Thanks @patio11 for the thoughtful feedback on our YC application, and @gabhubert for your directions on positioning the product — set the tone for our pitch!


There has been a lot of discussion about negative emissions technologies (NETs) lately. While we need to be skeptical of assumed planetary-scale engineering and wary of moral hazard, we also need much greater RD&D funding to keep our options open. A quick thread: 1/10
Energy system models love NETs, particularly for very rapid mitigation scenarios like 1.5C (where the alternative is zero global emissions by 2040)! More problematically, they also like tons of NETs in 2C scenarios where NETs are less essential. https://t.co/M3ACyD4cv7 2/10
In model world the math is simple: very rapid mitigation is expensive today, particularly once you get outside the power sector, and technological advancement may make later NETs cheaper than near-term mitigation after a point. 3/10
This is, of course, problematic if the aim is to ensure that particular targets (such as well-below 2C) are met; betting that a "backstop" technology that does not exist today at any meaningful scale will save the day is a hell of a moral hazard. 4/10
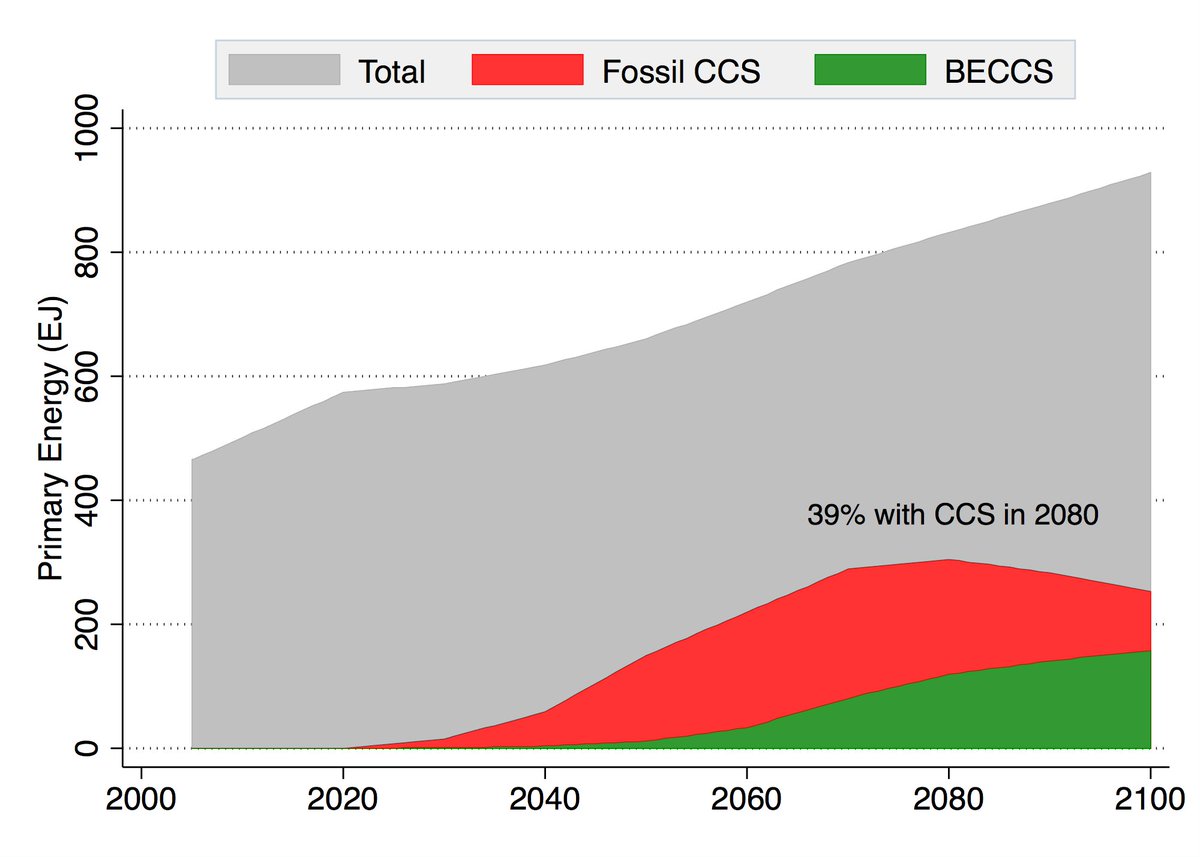
Many models go completely overboard with CCS, seeing a future resurgence of coal and a large part of global primary energy occurring with carbon capture. For example, here is what the MESSAGE SSP2-1.9 scenario shows: 5/10
Energy system models love NETs, particularly for very rapid mitigation scenarios like 1.5C (where the alternative is zero global emissions by 2040)! More problematically, they also like tons of NETs in 2C scenarios where NETs are less essential. https://t.co/M3ACyD4cv7 2/10
There is a lot of confusion about carbon budgets and how quickly emissions need to fall to zero to meet various warming targets. To cut through some of this morass, we can use some very simple emission pathways to explore what various targets would entail. 1/11 pic.twitter.com/Kriedtf0Ec
— Zeke Hausfather (@hausfath) September 24, 2020
In model world the math is simple: very rapid mitigation is expensive today, particularly once you get outside the power sector, and technological advancement may make later NETs cheaper than near-term mitigation after a point. 3/10
This is, of course, problematic if the aim is to ensure that particular targets (such as well-below 2C) are met; betting that a "backstop" technology that does not exist today at any meaningful scale will save the day is a hell of a moral hazard. 4/10
Many models go completely overboard with CCS, seeing a future resurgence of coal and a large part of global primary energy occurring with carbon capture. For example, here is what the MESSAGE SSP2-1.9 scenario shows: 5/10