
We just launched a fun little tool called Phantom Analyzer. It’s a 100% serverless tool that scans websites for hidden tracking pixels.
I want to talk about how we built it 👇
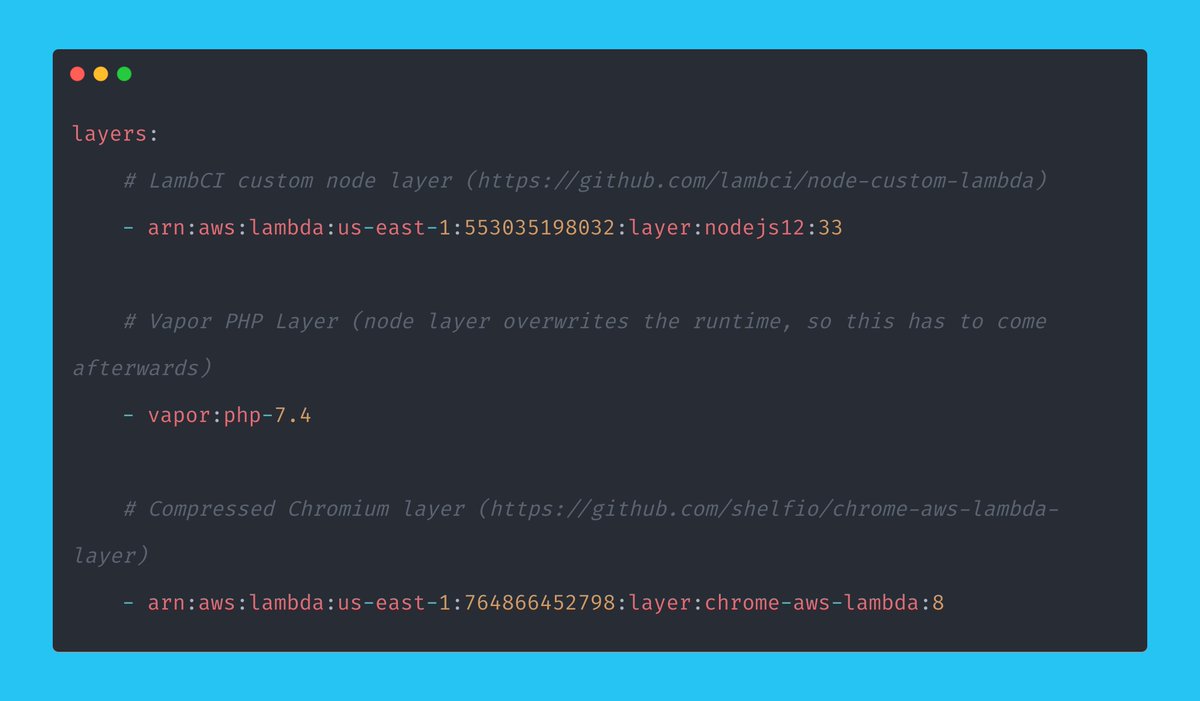
> Laravel Vapor
> ChipperCI for deployment
> SQS for queues
> DynamoDB for the database
We went with DynamoDB as we don’t want to worry about our database scaling!
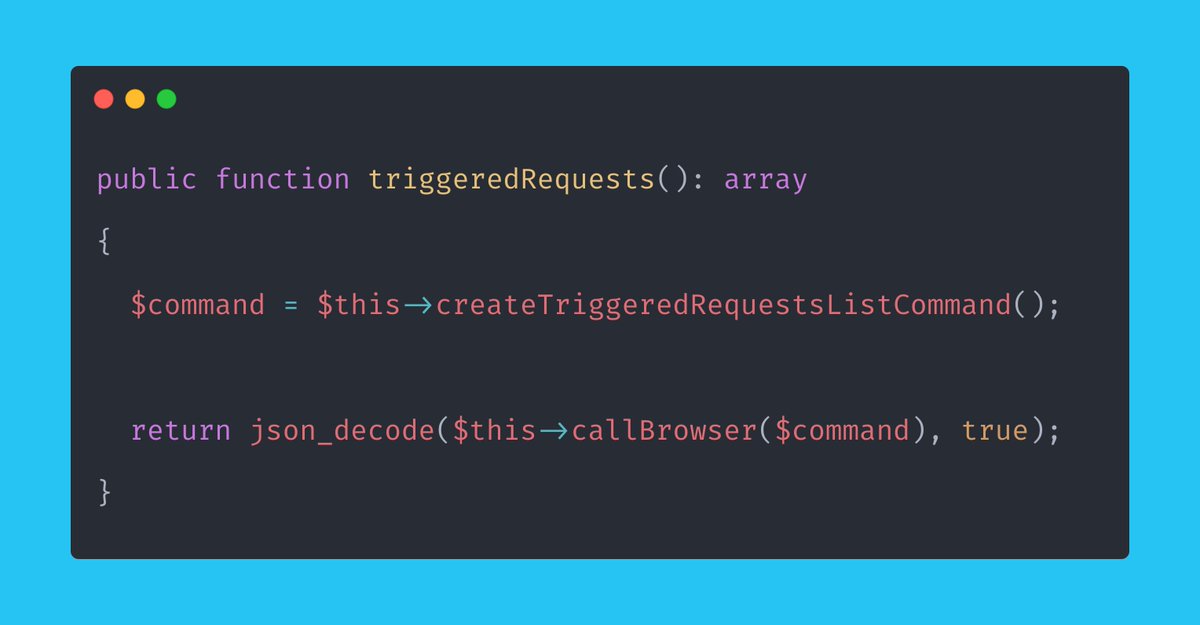
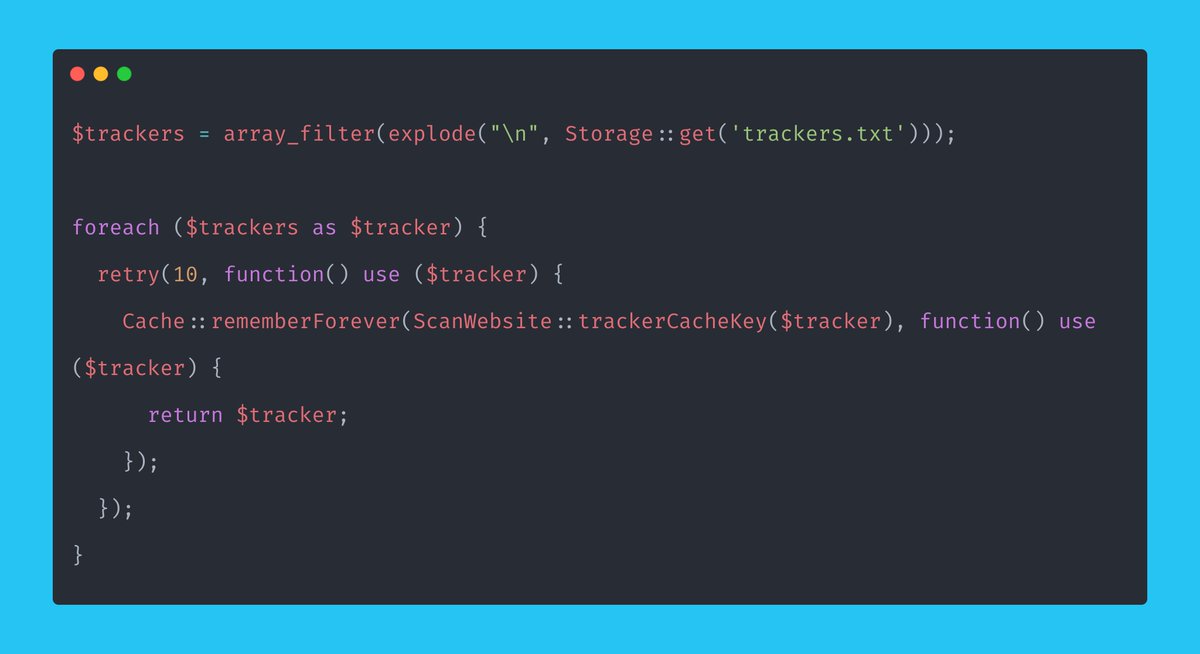
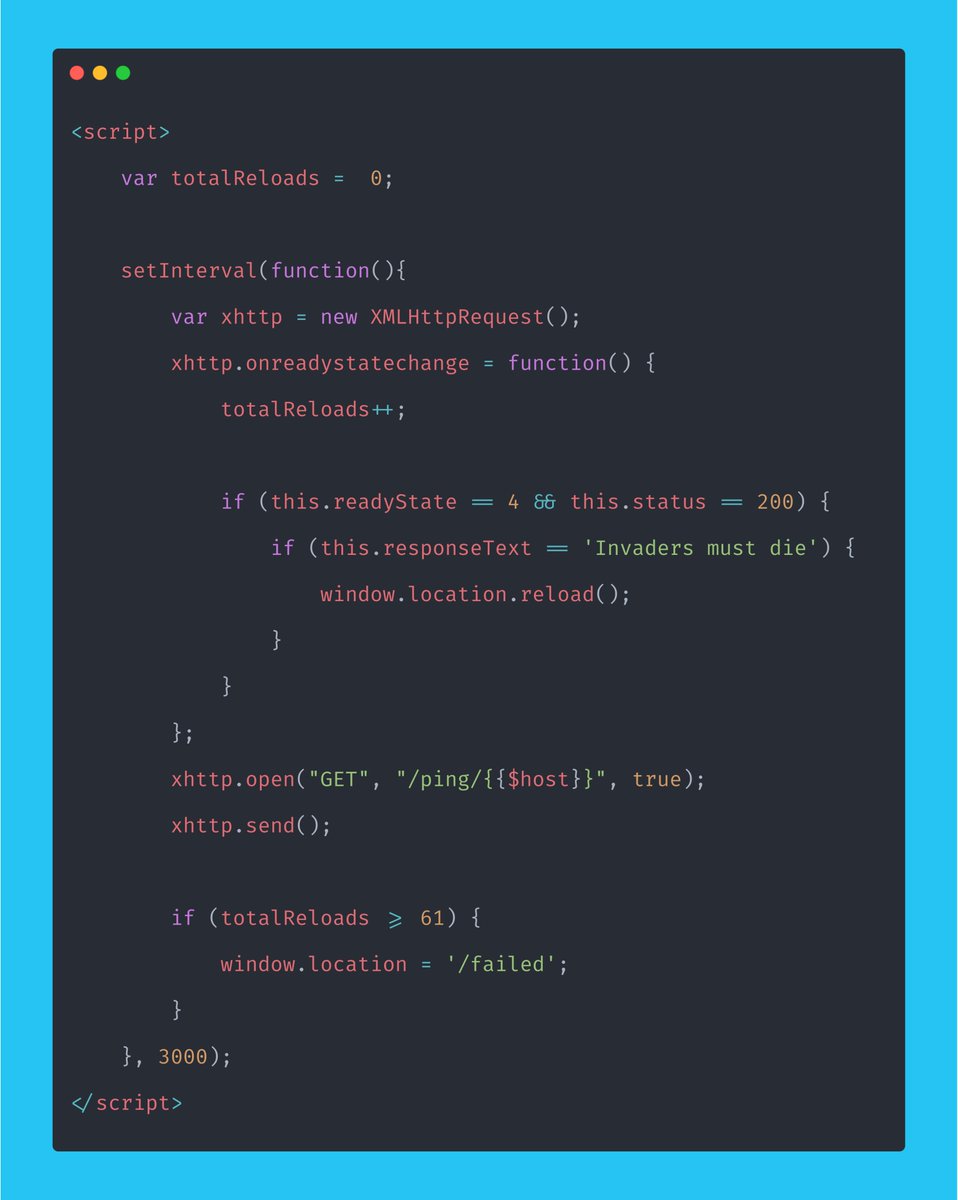
> How will we scan websites for tracking pixels?
> How will we utilize the queue and check the job is done?
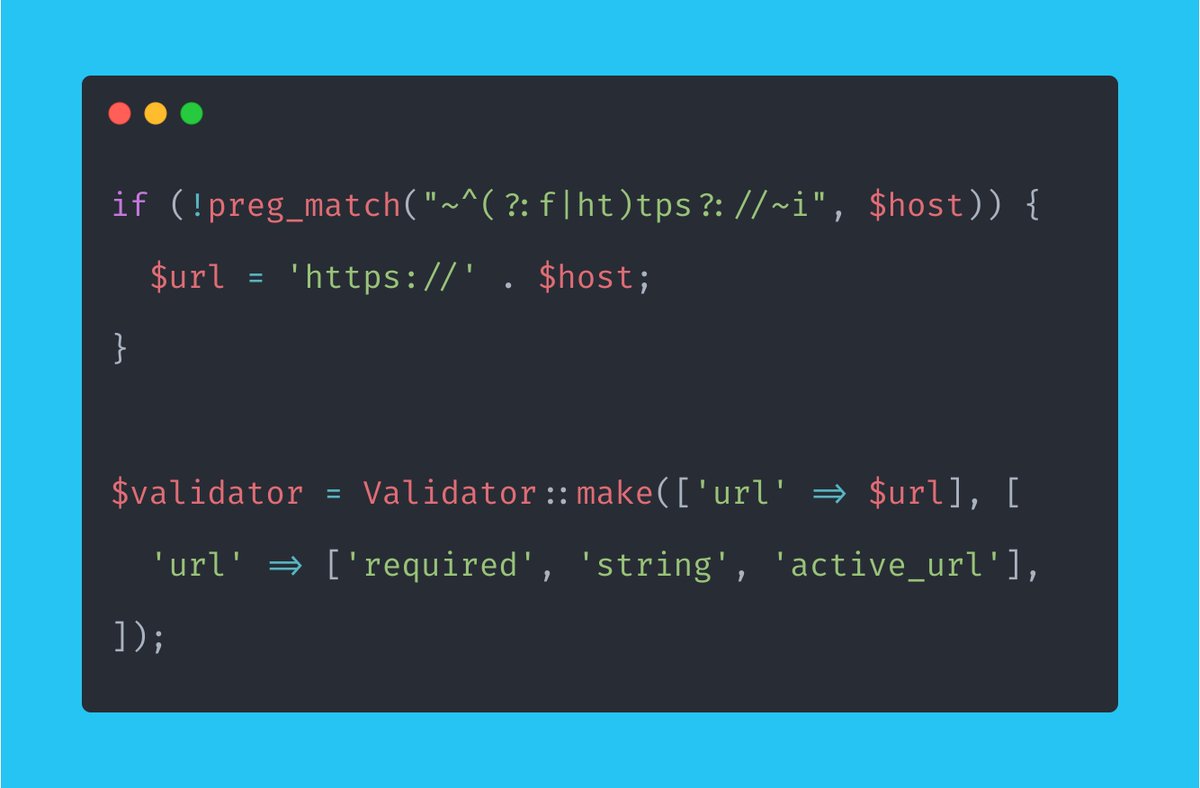
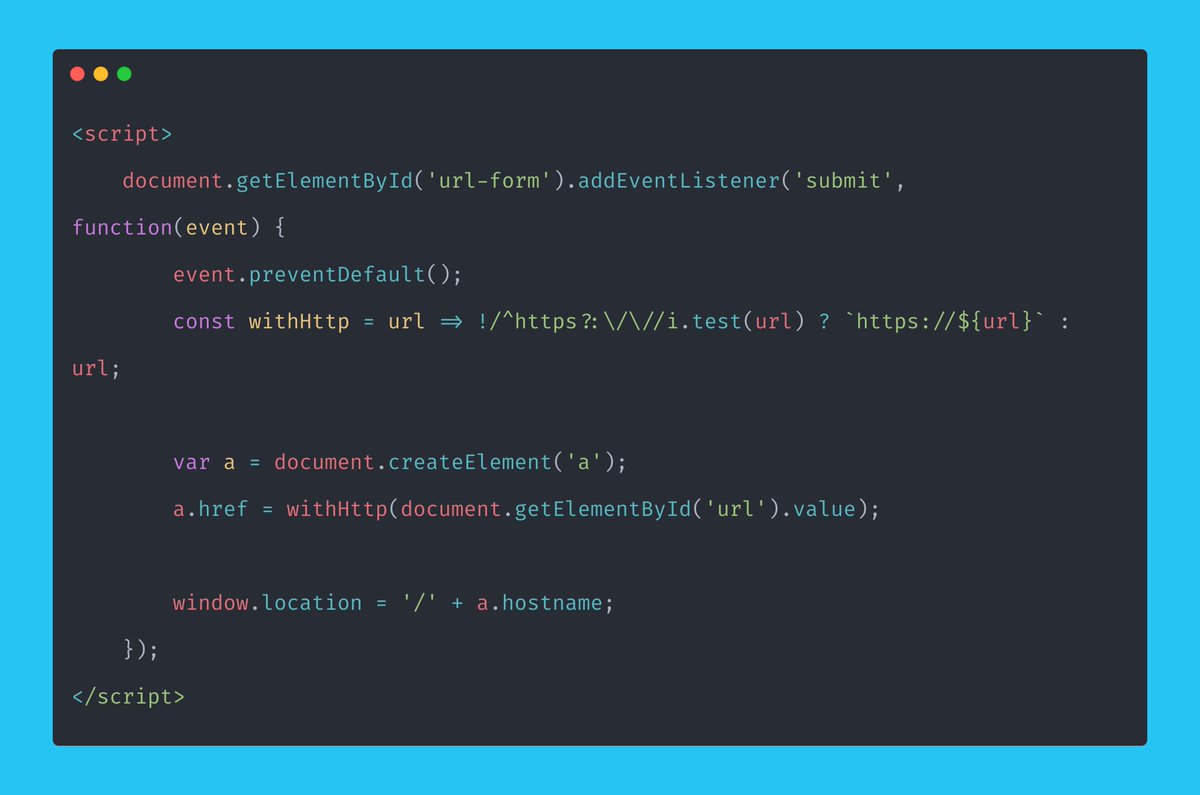
> How will we validate the URL?
Wait a minute...
Yes, out of the box, Browsershot already had what I needed. Are you kidding me?
> 1024MB of RAM
> 2048 of RAM for the queue (could likely reduce!)
> Warm of 500
> CLI Timeout of 180 seconds
Those settings all worked nicely.
More from Tech


1/ 👋 Excited to share what we’ve been building at https://t.co/GOQJ7LjQ2t + we are going to tweetstorm our progress every week!
Week 1 highlights: getting shortlisted for YC W2019🤞, acquiring a premium domain💰, meeting Substack's @hamishmckenzie and Stripe CEO @patrickc 🤩
2/ So what is Brew?
brew / bru : / to make (beer, coffee etc.) / verb: begin to develop 🌱
A place for you to enjoy premium content while supporting your favorite creators. Sort of like a ‘Consumer-facing Patreon’ cc @jackconte
(we’re still working on the pitch)
3/ So, why be so transparent? Two words: launch strategy.
jk 😅 a) I loooove doing something consistently for a long period of time b) limited downside and infinite upside (feedback, accountability, reach).
cc @altimor, @pmarca
4/ https://t.co/GOQJ7LjQ2t domain 🍻
It started with a cold email. Guess what? He was using BuyMeACoffee on his blog, and was excited to hear about what we're building next. Within 2w, we signed the deal at @Escrowcom's SF office. You’re a pleasure to work with @MichaelCyger!
5/ @ycombinator's invite for the in-person interview arrived that evening. Quite a day!
Thanks @patio11 for the thoughtful feedback on our YC application, and @gabhubert for your directions on positioning the product — set the tone for our pitch!

On press call, Zuckerberg says FB users "naturally engage more with sensational content" that comes close to violating its rules. Compares it to cable TV and tabloids, and says, "This seems to be true regardless of where we set our policy lines."
Zuckerberg says FB is in the process of setting up a "new independent body" that users will be able to appeal content takedowns to. Sort of like the "Facebook Supreme Court" idea he previewed earlier this year.
Zuckerberg: "One of my biggest lessons from this year is that when you connect more than 2 billion people, you’re going to see the good and bad of humanity."
This is how Facebook says it's trying to change the engagement pattern on its services. https://t.co/3p0PGc912o

.@RebeccaJarvis asks Zuckerberg if anyone is going to lose their job over the revelations in the NYT story. He dodges, says that personnel issues aren't a public matter, and that employee performance is evaluated all the time.
Zuckerberg says FB is in the process of setting up a "new independent body" that users will be able to appeal content takedowns to. Sort of like the "Facebook Supreme Court" idea he previewed earlier this year.
Zuckerberg: "One of my biggest lessons from this year is that when you connect more than 2 billion people, you’re going to see the good and bad of humanity."
This is how Facebook says it's trying to change the engagement pattern on its services. https://t.co/3p0PGc912o
.@RebeccaJarvis asks Zuckerberg if anyone is going to lose their job over the revelations in the NYT story. He dodges, says that personnel issues aren't a public matter, and that employee performance is evaluated all the time.


You May Also Like


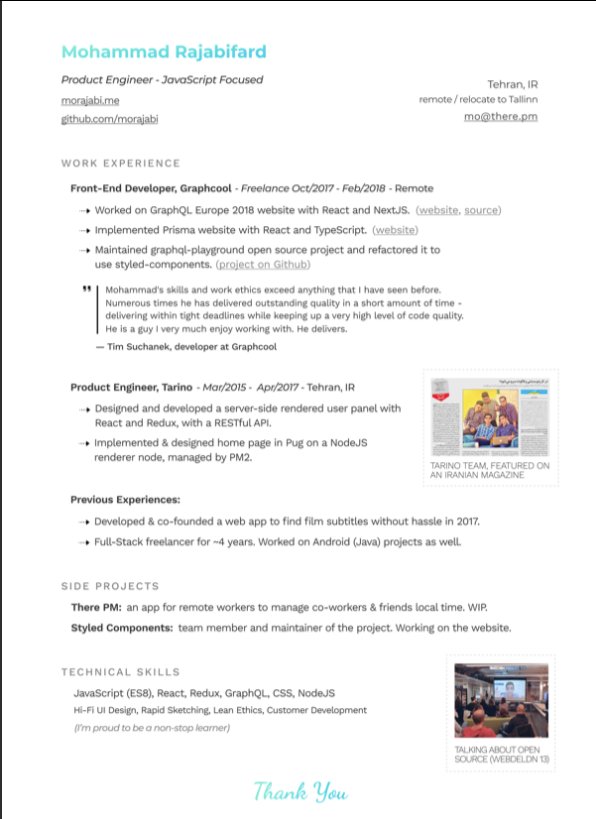
👨💻 Last resume I sent to a startup one year ago, sharing with you to get ideas:
- Forget what you don't have, make your strength bold
- Pick one work experience and explain what you did in detail w/ bullet points
- Write it towards the role you apply
- Give social proof
/thread
"But I got no work experience..."
Make a open source lib, make a small side project for yourself, do freelance work, ask friends to work with them, no friends? Find friends on Github, and Twitter.
Bonus points:
- Show you care about the company: I used the company's brand font and gradient for in the resume for my name and "Thank You" note.
- Don't list 15 things and libraries you worked with, pick the most related ones to the role you're applying.
-🙅♂️"copy cover letter"
"I got no firends, no work"
One practical way is to reach out to conferences and offer to make their website for free. But make sure to do it good. You'll get:
- a project for portfolio
- new friends
- work experience
- learnt new stuff
- new thing for Twitter bio
If you don't even have the skills yet, why not try your chance for @LambdaSchool? No? @freeCodeCamp. Still not? Pick something from here and learn https://t.co/7NPS1zbLTi
You'll feel very overwhelmed, no escape, just acknowledge it and keep pushing.

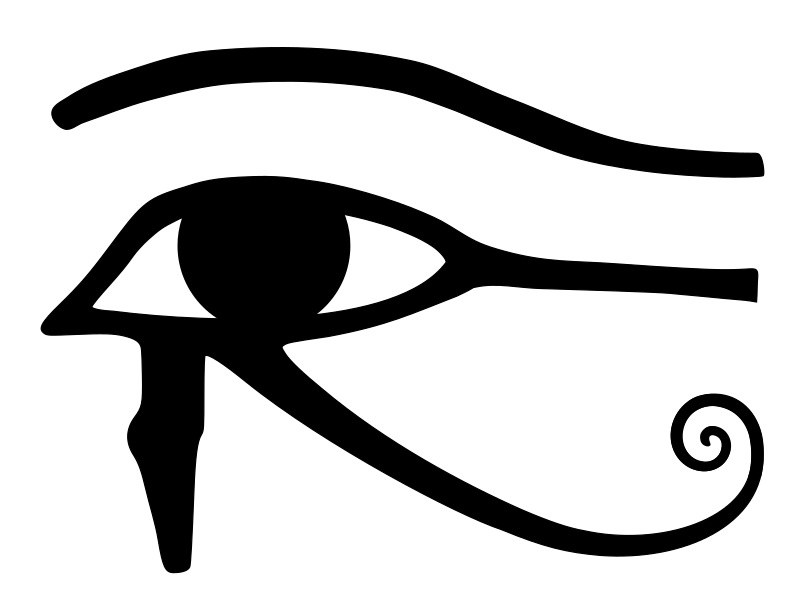
The Eye of Horus. 1/*
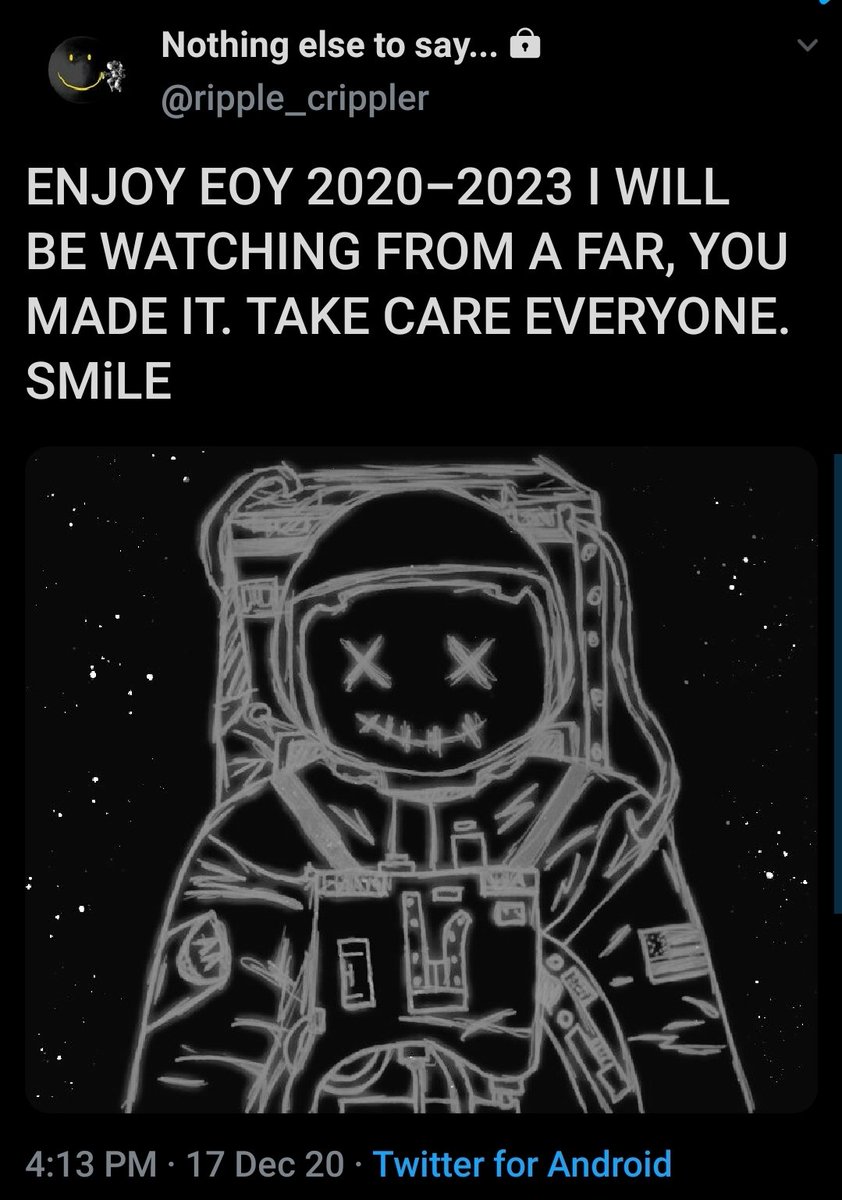
I believe that @ripple_crippler and @looP_rM311_7211 are the same person. I know, nobody believes that. 2/*
Today I want to prove that Mr Pool smile faces mean XRP and price increase. In Ripple_Crippler, previous to Mr Pool existence, smile faces were frequent. They were very similar to the ones Mr Pool posts. The eyes also were usually a couple of "x", in fact, XRP logo. 3/*

The smile XRP-eyed face also appears related to the Moon. XRP going to the Moon. 4/*
And smile XRP-eyed faces also appear related to Egypt. In particular, to the Eye of Horus. https://t.co/i4rRzuQ0gZ 5/*

I believe that @ripple_crippler and @looP_rM311_7211 are the same person. I know, nobody believes that. 2/*
Today I want to prove that Mr Pool smile faces mean XRP and price increase. In Ripple_Crippler, previous to Mr Pool existence, smile faces were frequent. They were very similar to the ones Mr Pool posts. The eyes also were usually a couple of "x", in fact, XRP logo. 3/*
The smile XRP-eyed face also appears related to the Moon. XRP going to the Moon. 4/*
And smile XRP-eyed faces also appear related to Egypt. In particular, to the Eye of Horus. https://t.co/i4rRzuQ0gZ 5/*